Assignment Information
1. The name you will give your artifact. This could be a brand or product name if you are doing something in a commercial context, or could simply be what you will call this artifact. I would like you to use your skills in naming from the video modules this week to create this name.
2. One or more nice images of your prototype. (In most cases this will be a photograph, but in the case of websites or other non-physical artifacts, you may use other types of images.) Provide some annotation or explanation of the artifact if needed to understand how it works and its key features.
3. Some background on the gap you addressed and your problem definition (e.g., the key user needs).
4. A very short (i.e., one paragraph) description of what the next steps would be to further refine and develop your artifact.
5. Any other information you feel might be interesting to your classmates, or relevant to evaluating your work.
This information need not be lengthy. You can probably provide this information in the equivalent of 1-2 pages. However, you are welcome to provide more detail. Just, be sure that the important information (i.e.,items 1-4 above) are presented clearly and concisely so that someone can easily understand what you have done.
Artifact Name:
Kitchen Eating Area Plan
Background Info:
My design challenge was to redesign our kitchen eating area to make it more functional and add some seats so that we could seat up to 8. In our current kitchen we have a small bench under the window. The kids really like to sit there when we make dinner. We knew that any redesign would have to incorporate a bench under the window. I wanted to make the window bench serve two purposes. It could be a cool place to hang out and also be a seat at the dinner table.
One issue we faced was that the kitchen is not very large so anything we designed would have to be compact. I found that by placing a bench along the wall I could make the table a bit larger and still take up the same amount of space as the smaller table with chairs. So, what we ended up with was an L shaped bench that went along the wall and under the window.
I experimented a but with table top shapes. I found that by cutting off the corners and making an angle I could save a bit of space without sacrificing eating spaces. I'd still have 8 which was our requirement. The space is a bit tight but that's a sacrifice we are willing to make as we don't seat 8 often. The prototype fits 5 very well which is how many we typically have at dinner.
Gap:
How can we design the kitchen eating area to make it more functional and inviting?
Key User Needs:
seats 8
bench under window
cost effective
fits the space well
comfortable
inviting
Next Steps:
I plan to work out some design ideas for table top material. On my list right now are several things.
- reclaimed wood
- tile
- plywood
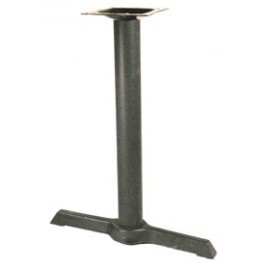
I can get table legs like this online for about 35 dollars each. Expensive but they are sturdy and durable and are a perfect solution to a design problem.
Pictures of my final prototype below
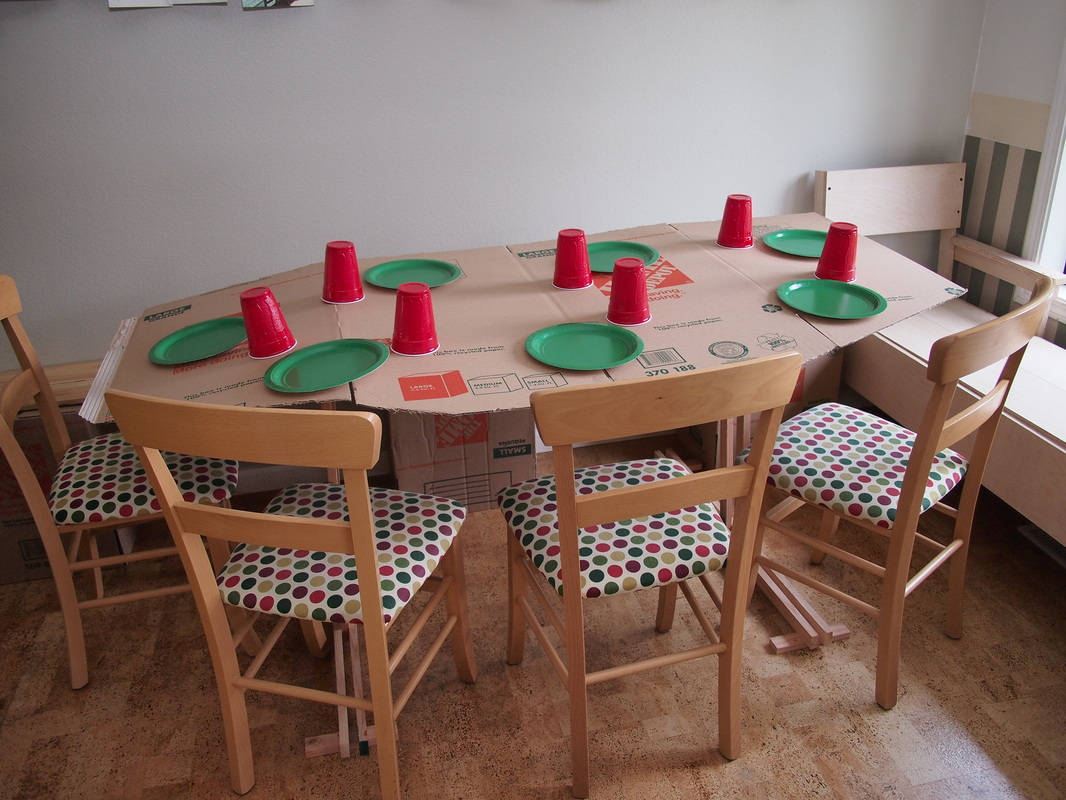
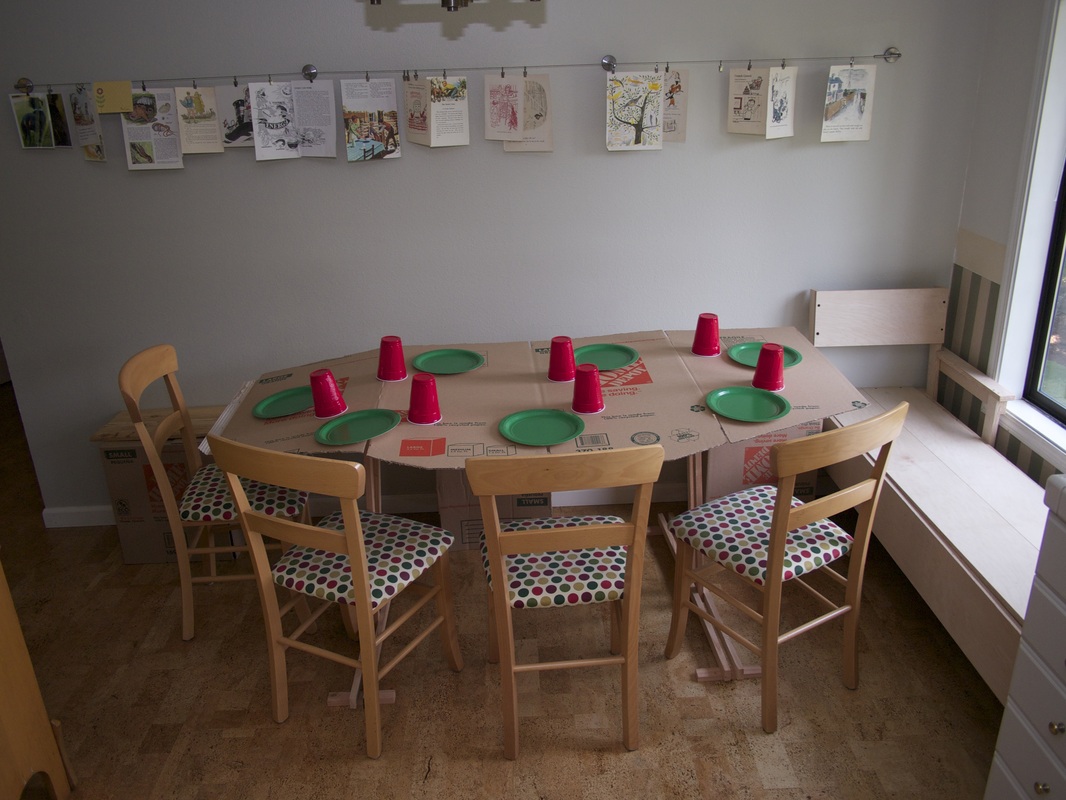
Here you can see the table shape and a view of the bench under the window. The table is set for 7 comfortably but 8 will fit if I put one more setting on the long wall with the bench. The prototype for the top is simple cardboard. I'm simply prototyping the shape at this point and not materials.
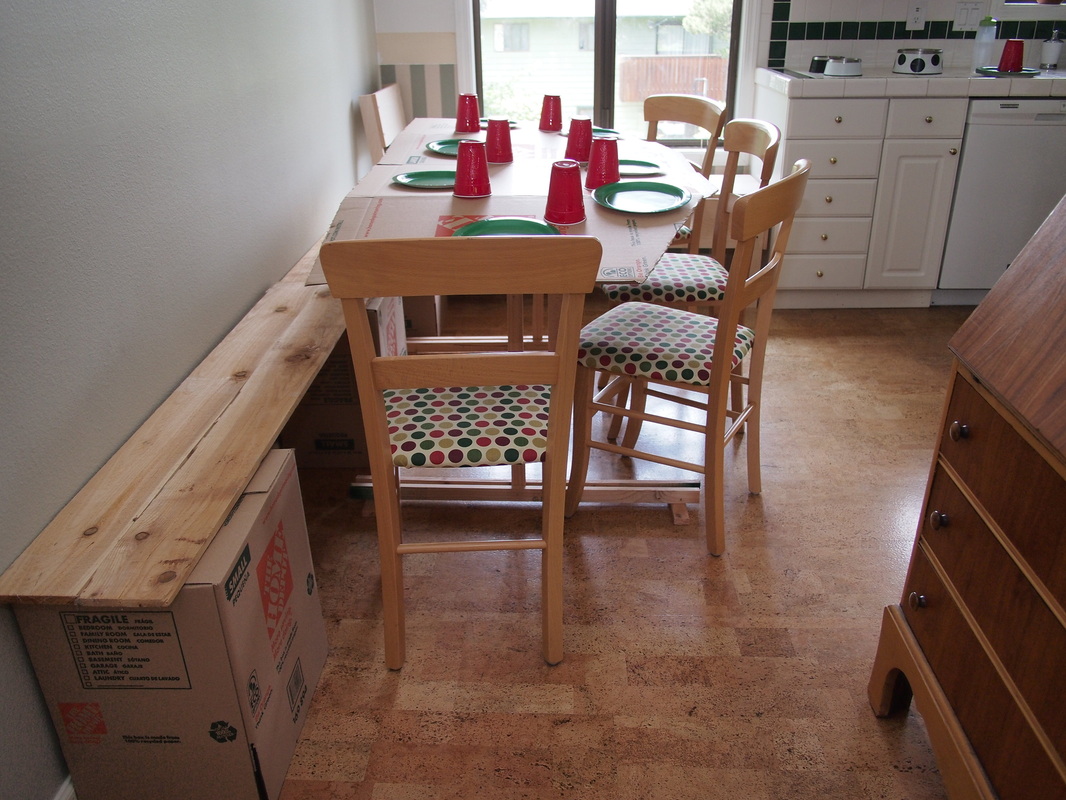
Here is a view from a different angle. You can see the bench running the length of the wall. This allows the table to be much closer to the wall than it would if there were chairs along the wall.

This image shows a solution to a problem I had with the table legs in my previous prototype. I had 4 traditional legs at the corners which made it difficult to get in and out of the bench seat. By using an upside down T and getting the legs away from the corners I solved that problem and you no longer bump your knees against the table legs when you get in and out of the bench.
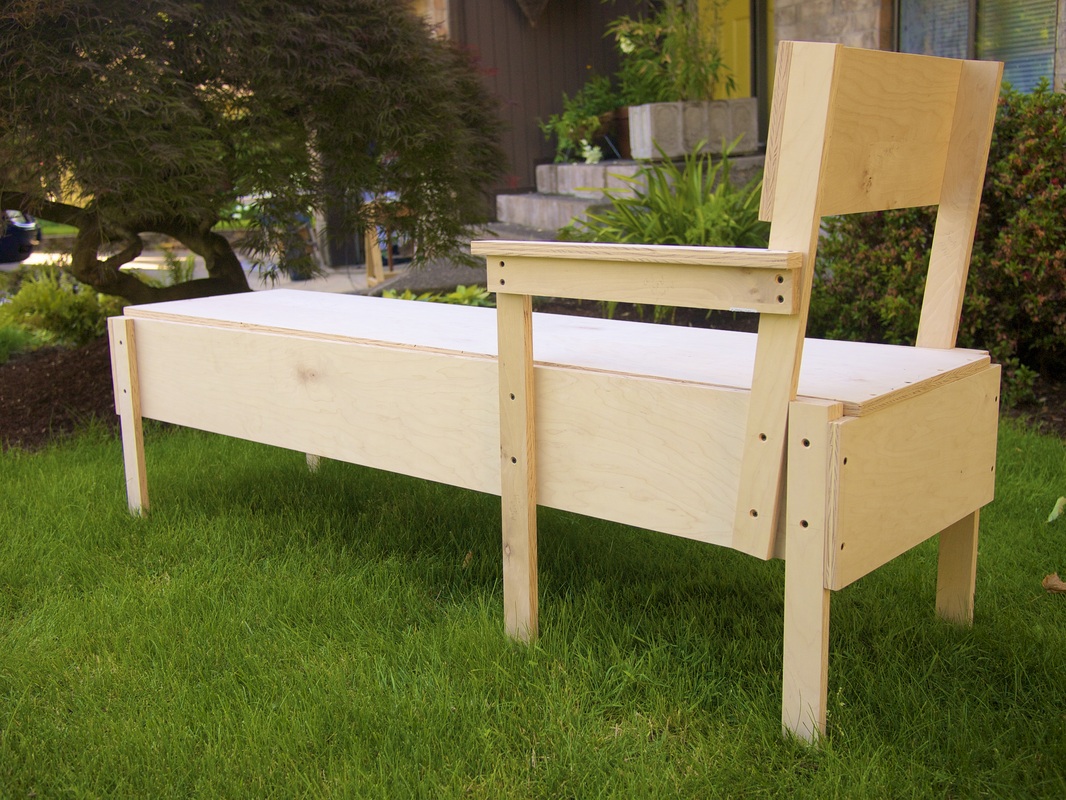
This is the window bench custom made for the space. It's the item that I did the most finished prototype of. It was designed to be simply made out of inexpensive materials. It is made from one sheet of 3/4 inch plywood costing less than 40 dollars. The other bench will be modeled on this one.
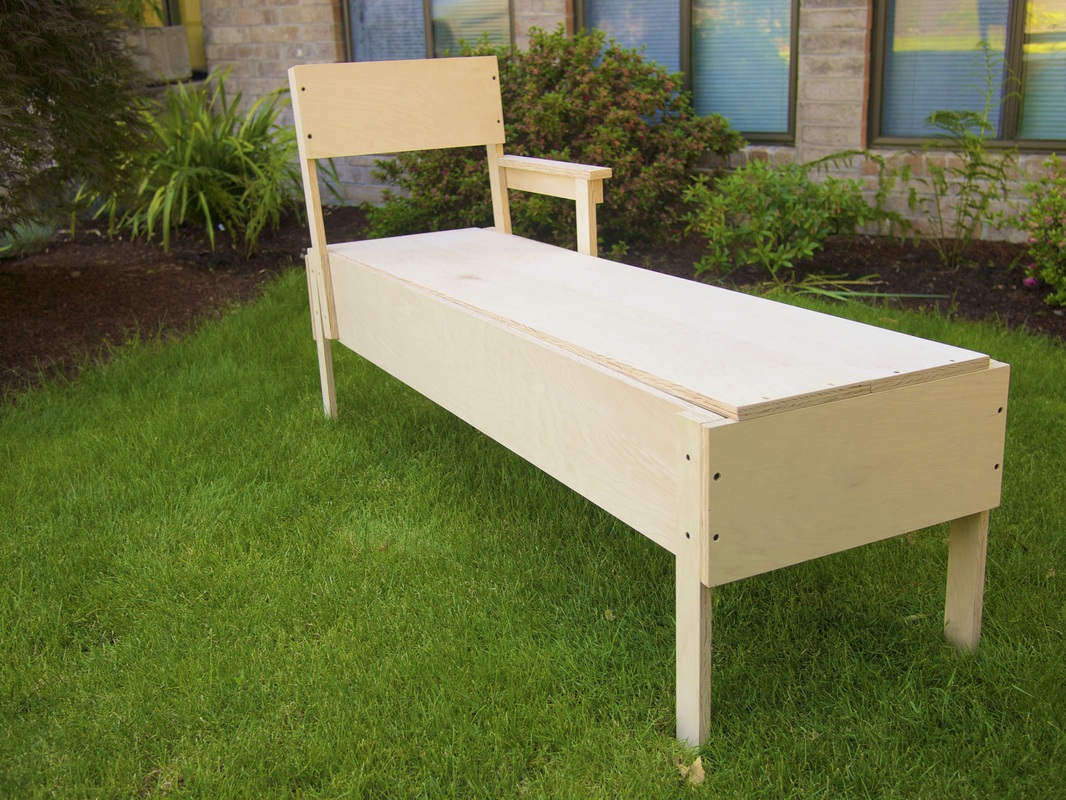
Alternate view of the bench. The slight slope to the top and backward lean of the seat back make it much more comfortable than the bench we had under the window previously.
Before image of kitchen eating area

Proposed design
 RSS Feed